


共執行 46 個查詢,用時 0.397014 秒,在線 369 人,Gzip 已啟用,佔用記憶體 4.124 MB
Powered by GEJOREv2.7.3


GR9300-06
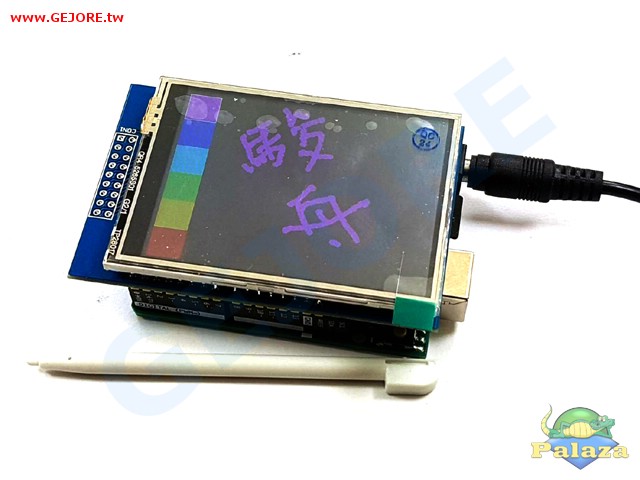
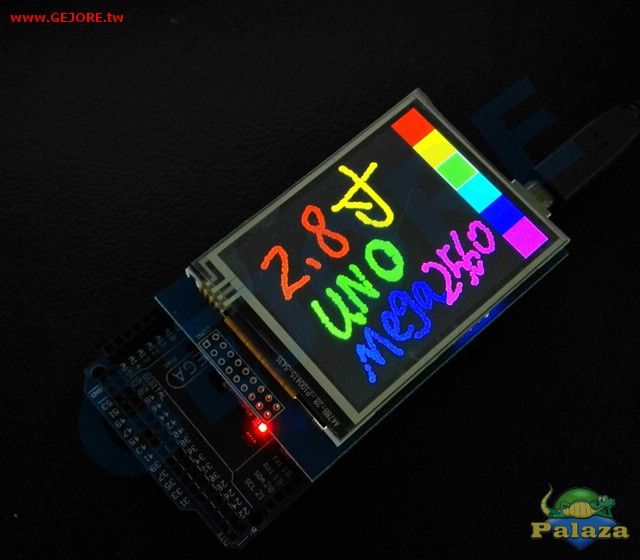
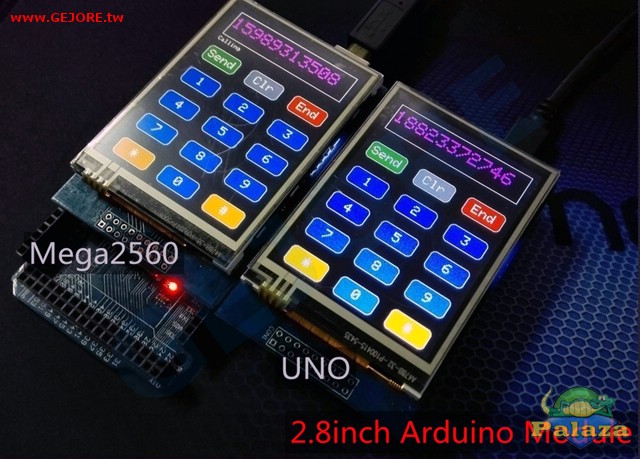
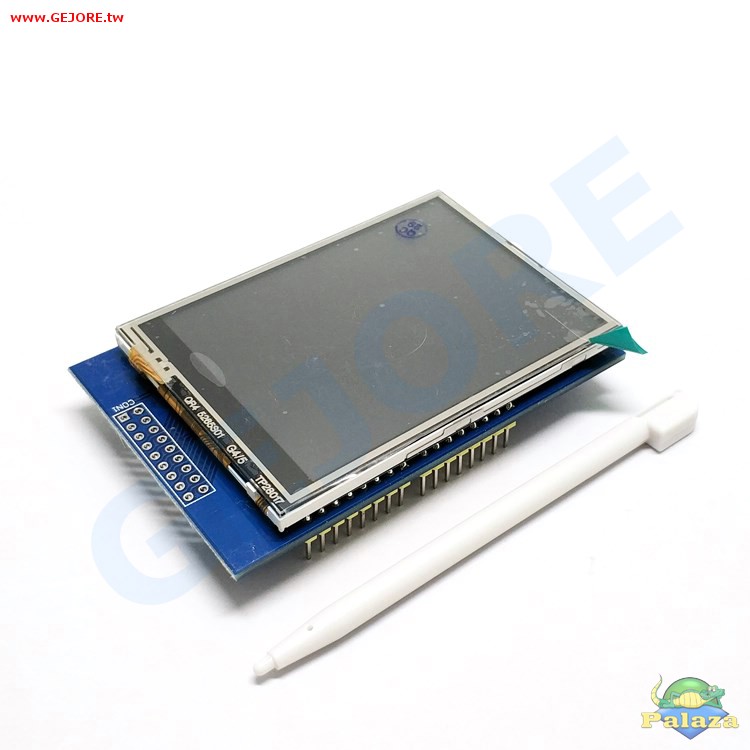
全新2.8吋Arduino 觸摸屏模塊,可直插ArduinoUNO ,Mega2560等開發板,ILI9341驅動,帶觸摸。
重要提示:
此屏使用台灣大廠的玻璃,視角非常大,不是一般的國產垃圾屏可以比的(垃圾屏視角小,偏一點就看不清楚,必須正對著屏看)。
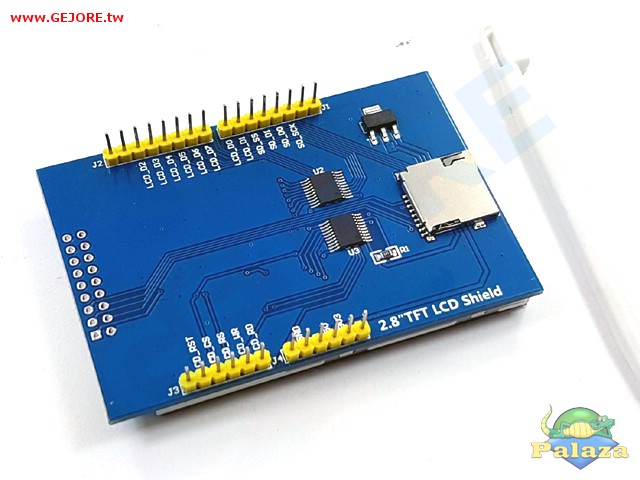
為方便介紹,以下我們就將 2.8" TFT LCD Shield 模塊統稱為 "面板"
網路賣場幾乎 99% 的賣場裡面的連結都是失效的,即使下載下來的函式庫,沒有經過校正,也一樣不能直接用!!
因為函式庫裡面並沒有提供校正 CODE,要怎麼校正觸控面板?
不用擔心,我們都會附給您,您不用再到處找,四處求人給你正確連結!!
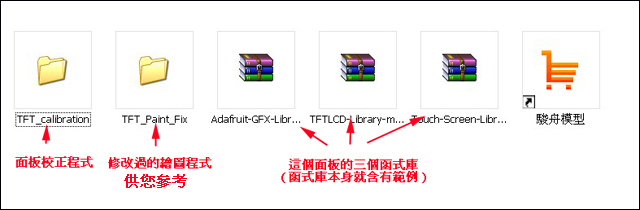
最底下我們會提供您如何啟用這個面板及函式庫直接下載,並舉一個函式庫附的繪圖範例,協助您快速使用這個面板!!
函式庫 & 校正程式碼 以及 設計程式時要注意的地方我們都用中文標示在程式碼裡
(因為露天會攔截一些特殊符號,因此建議直接到我們官網此商品賣場下查看複製程式碼)
包裝內容:
2.8" TFT LCD Shield 觸控面板 *1
手寫筆 *1
函式庫及校正程式下載
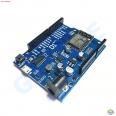
以上圖片中的電源與UNO 為執行程式展示用,本賣場套件並未包含這兩項!!
請點擊這裡下載
官方文件下載:
https://www.gejore.tw/dl/2.8inch_Arduino_ILI9341_V3.2(GR9300-06).zip
一上電,面板呈現完全反白是正常的,要靠 uno 或 mega2560 開發板執行程式驅動後才會有您想要的畫面,不是故障!!
安裝步驟:
1.先將函示庫全部解壓到 arduino 的 \libraries 目錄下!!(如 C:\Documents and Settings\Arduino\libraries)
2.將 2.8 TFT LCD Shield 插入 Arduino UNO R3,並與電腦 USB 連接
3.開啟 Arduino IDE,將校正程式燒進 uno 並執行,用附贈的手寫筆點擊面板上依序出現在四個角落的藍點
4.用紙記下面板上出現的 X,Y 四個座標位置,這就是您日後寫程式會用到的面板觸控範圍
接下來您就可以開始設計您的程式!!
以下我引用函式庫裡的 tftpaint 範例說明,您要改幾個重點(紅色)地方,就能正確使用!
// Paint example specifically for the TFTLCD breakout board.

// If using the Arduino shield, use the tftpaint_shield.pde sketch instead!

// DOES NOT CURRENTLY WORK ON ARDUINO LEONARDO


#include <Adafruit_GFX.h>    // Core graphics library

#include <Adafruit_TFTLCD.h> // Hardware-specific library

#include <TouchScreen.h>

#if defined(__SAM3X8E__)

    #undef __FlashStringHelper::F(string_literal)

    #define F(string_literal) string_literal

#endif // When using the BREAKOUT BOARD only, use these 8 data lines to the LCD:

// For the Arduino Uno, Duemilanove, Diecimila, etc.:

//   D0 connects to digital pin 8  (Notice these are

//   D1 connects to digital pin 9   NOT in order!)

//   D2 connects to digital pin 2

//   D3 connects to digital pin 3

//   D4 connects to digital pin 4

//   D5 connects to digital pin 5

//   D6 connects to digital pin 6

//   D7 connects to digital pin 7

// For the Arduino Mega, use digital pins 22 through 29

// (on the 2-row header at the end of the board).

//   D0 connects to digital pin 22

//   D1 connects to digital pin 23

//   D2 connects to digital pin 24

//   D3 connects to digital pin 25

//   D4 connects to digital pin 26

//   D5 connects to digital pin 27

//   D6 connects to digital pin 28

//   D7 connects to digital pin 29

// For the Arduino Due, use digital pins 33 through 40

// (on the 2-row header at the end of the board).

//   D0 connects to digital pin 33

//   D1 connects to digital pin 34

//   D2 connects to digital pin 35

//   D3 connects to digital pin 36

//   D4 connects to digital pin 37

//   D5 connects to digital pin 38

//   D6 connects to digital pin 39

//   D7 connects to digital pin 40

#define YP A3  // must be an analog pin, use "An" notation!

#define XM A2  // must be an analog pin, use "An" notation!

#define YM 9   // can be a digital pin

#define XP 8   // can be a digital pin

//面板經過校正後,會得到 X,Y 的最小與最大值,把它修改替代下面四個參數即可

#define TS_MINX 137

#define TS_MINY 96

#define TS_MAXX 894

#define TS_MAXY 883

// For better pressure precision, we need to know the resistance

// between X+ and X- Use any multimeter to read it

// For the one we're using, its 300 ohms across the X plate

TouchScreen ts = TouchScreen(XP, YP, XM, YM, 300);

#define LCD_CS A3

#define LCD_CD A2

#define LCD_WR A1

#define LCD_RD A0

// optional

#define LCD_RESET A4

// Assign human-readable names to some common 16-bit color values:

#define BLACK   0x0000

#define BLUE    0x001F

#define RED     0xF800

#define GREEN   0x07E0

#define CYAN    0x07FF

#define MAGENTA 0xF81F

#define YELLOW  0xFFE0

#define WHITE   0xFFFF


Adafruit_TFTLCD tft(LCD_CS, LCD_CD, LCD_WR, LCD_RD, LCD_RESET);

#define BOXSIZE 40

#define PENRADIUS 3

int oldcolor, currentcolor;

void setup(void) {

  Serial.begin(9600);

  Serial.println(F("Paint!"));


  tft.reset();


  //把原本用程式判斷面板驅動晶片的方式,改為強制設定給 ILI9341

  uint16_t identifier = 0x9341;


  // 下面原本的範例內容,直接標註起來,這很重要,不然面板會一片反白,甚麼都看不到!!

  // 因為這段範例程式碼判讀面板的驅動晶片不太精確,會偵測不出來而卡在這裡,所以面

  // 板才會一片反白,沒有任何訊息!!

  /* uint16_t identifier = tft.readID();

  if(identifier == 0x9325) {

    Serial.println(F("Found ILI9325 LCD driver"));

  } else if(identifier == 0x9328) {

    Serial.println(F("Found ILI9328 LCD driver"));

  } else if(identifier == 0x7575) {

    Serial.println(F("Found HX8347G LCD driver"));

  } else if(identifier == 0x9341) {

    Serial.println(F("Found ILI9341 LCD driver"));

  } else if(identifier == 0x8357) {

    Serial.println(F("Found HX8357D LCD driver"));

  } else {

    Serial.print(F("Unknown LCD driver chip: "));

    Serial.println(identifier, HEX);

    Serial.println(F("If using the Adafruit 2.8\" TFT Arduino shield, the line:"));

    Serial.println(F("  #define USE_ADAFRUIT_SHIELD_PINOUT"));

    Serial.println(F("should appear in the library header (Adafruit_TFT.h)."));

    Serial.println(F("If using the breakout board, it should NOT be #defined!"));

    Serial.println(F("Also if using the breakout, double-check that all wiring"));

    Serial.println(F("matches the tutorial."));

    return;

  }*/

  tft.begin(identifier);

  tft.fillScreen(BLACK);

  tft.fillRect(0, 0, BOXSIZE, BOXSIZE, RED);

  tft.fillRect(BOXSIZE, 0, BOXSIZE, BOXSIZE, YELLOW);

  tft.fillRect(BOXSIZE*2, 0, BOXSIZE, BOXSIZE, GREEN);

  tft.fillRect(BOXSIZE*3, 0, BOXSIZE, BOXSIZE, CYAN);

  tft.fillRect(BOXSIZE*4, 0, BOXSIZE, BOXSIZE, BLUE);

  tft.fillRect(BOXSIZE*5, 0, BOXSIZE, BOXSIZE, MAGENTA);

  // tft.fillRect(BOXSIZE*6, 0, BOXSIZE, BOXSIZE, WHITE);


  tft.drawRect(0, 0, BOXSIZE, BOXSIZE, WHITE);

  currentcolor = RED;


  pinMode(13, OUTPUT);

}

#define MINPRESSURE 10

#define MAXPRESSURE 1000

void loop()

{

  digitalWrite(13, HIGH);

  TSPoint p = ts.getPoint();

  digitalWrite(13, LOW);

  // if sharing pins, you'll need to fix the directions of the touchscreen pins

  //pinMode(XP, OUTPUT);

  pinMode(XM, OUTPUT);

  pinMode(YP, OUTPUT);

  //pinMode(YM, OUTPUT);

  // we have some minimum pressure we consider 'valid'

  // pressure of 0 means no pressing!

  if (p.z > MINPRESSURE && p.z < MAXPRESSURE) {

    /*

    Serial.print("X = "); Serial.print(p.x);

    Serial.print("\tY = "); Serial.print(p.y);

    Serial.print("\tPressure = "); Serial.println(p.z);

    */


    if (p.y < (TS_MINY-5)) {

      Serial.println("erase");

      // press the bottom of the screen to erase

      tft.fillRect(0, BOXSIZE, tft.width(), tft.height()-BOXSIZE, BLACK);

    }

    // scale from 0->1023 to tft.width


  // 把原本這一段範例內容標記起來,改成紅色部分,繪圖才不會顛到

   /*

    p.x = map(p.x, TS_MINX, TS_MAXX, tft.width(), 0);

    p.y = map(p.y, TS_MINY, TS_MAXY, tft.height(), 0);

    */


    p.x = map(p.x, TS_MINX, TS_MAXX, 0, tft.width());

    p.y = map(p.y, TS_MINY, TS_MAXY, tft.height(), 0);


    /*

    Serial.print("("); Serial.print(p.x);

    Serial.print(", "); Serial.print(p.y);

    Serial.println(")");

    */

    if (p.y < BOXSIZE) {

       oldcolor = currentcolor;

       if (p.x < BOXSIZE) {

         currentcolor = RED;

         tft.drawRect(0, 0, BOXSIZE, BOXSIZE, WHITE);

       } else if (p.x < BOXSIZE*2) {

         currentcolor = YELLOW;

         tft.drawRect(BOXSIZE, 0, BOXSIZE, BOXSIZE, WHITE);

       } else if (p.x < BOXSIZE*3) {

         currentcolor = GREEN;

         tft.drawRect(BOXSIZE*2, 0, BOXSIZE, BOXSIZE, WHITE);

       } else if (p.x < BOXSIZE*4) {

         currentcolor = CYAN;

         tft.drawRect(BOXSIZE*3, 0, BOXSIZE, BOXSIZE, WHITE);

       } else if (p.x < BOXSIZE*5) {

         currentcolor = BLUE;

         tft.drawRect(BOXSIZE*4, 0, BOXSIZE, BOXSIZE, WHITE);

       } else if (p.x < BOXSIZE*6) {

         currentcolor = MAGENTA;

         tft.drawRect(BOXSIZE*5, 0, BOXSIZE, BOXSIZE, WHITE);

       }

       if (oldcolor != currentcolor) {

          if (oldcolor == RED) tft.fillRect(0, 0, BOXSIZE, BOXSIZE, RED);

          if (oldcolor == YELLOW) tft.fillRect(BOXSIZE, 0, BOXSIZE, BOXSIZE, YELLOW);

          if (oldcolor == GREEN) tft.fillRect(BOXSIZE*2, 0, BOXSIZE, BOXSIZE, GREEN);

          if (oldcolor == CYAN) tft.fillRect(BOXSIZE*3, 0, BOXSIZE, BOXSIZE, CYAN);

          if (oldcolor == BLUE) tft.fillRect(BOXSIZE*4, 0, BOXSIZE, BOXSIZE, BLUE);

          if (oldcolor == MAGENTA) tft.fillRect(BOXSIZE*5, 0, BOXSIZE, BOXSIZE, MAGENTA);

       }

    }

    if (((p.y-PENRADIUS) > BOXSIZE) && ((p.y+PENRADIUS) < tft.height())) {

      tft.fillCircle(p.x, p.y, PENRADIUS, currentcolor);

    }

  }

}
| 會員名稱 | 購買數量 | 購買時間 | 訂單狀態 |
| lun***** | 2 | 07-15 | 成交 |
| pen***** | 1 | 08-26 | 成交 |
| oil***** | 1 | 05-14 | 成交 |
| piy***** | 1 | 08-26 | 成交 |
| air***** | 1 | 03-26 | 成交 |
| scy***** | 1 | 11-13 | 成交 |
| sp_***** | 1 | 08-18 | 成交 |
| mjx***** | 1 | 05-18 | 成交 |
| a77***** | 1 | 05-12 | 成交 |
| ken***** | 3 | 05-12 | 成交 |